Waffle Patterns Momiji rain jacket
22 Feb 2022 08:08 amI had a waterproof breathable jacket that I think I made from fabric purchased when you were still allowed to use the Goretex brand name. It was a Burda pattern, super simple, and super annoying. It was a pullover (NO), had no pockets for my hands (NO), a kangaroo pocket (ok), an ill-fitting hood (ok), raglan sleeves (yes), an asymmetric closure (yes), and was color-blocked (yes). The capital NOs outweighed everything else.
It delaminated from age. And the arm holes would rip out regularly because of the whole putting-it-on-over-my-head thing.
I decided I would be environmentally conscious, and use waxed cotton canvas for the replacement. It turned out to be not remotely waterproof, except that it was another layer for the rain to soak through before it got to me.
So the replacement replacement had to be waterproof breathable fabric, have the same interesting asymmetry and color-blocking-ness, a kangaroo pocket is fine, a taller front collar, and pockets for my hands.
Enter the Momiji Jacket from Waffle Patterns!
I stumbled across Waffle Patterns a few months ago (or years, whatever). I was immediately drawn to the designs because they had interesting pockets. Like, there are so many pockets she has a pattern collection of just pockets. Yes, please.
This jacket pattern is either just a stand-up collar with a kangaroo pocket and tabs on the cuffs, or a hood version with with many pocket variations, also including a kangaroo pocket, but with a hand warmer pocket built in, a chest pocket, a ticket pocket on the sleeve, and a knit cuff. You can mix and match pockets and details between the versions. Both have the asymmetric closure.
I chose view A with the hood and maximum pocket-age, and just a plain cuff. This ticked all the boxes.
For the fabric, I decided on a blue called Wedgewood and a black ripstop W/P/B. Since the pattern calls for all one color, I had to estimate the amount needed for each block. I got 1.5 yds black, and 1.25 yds blue. I could have bought .75 yards of the blue and had enough.
For the pockets, I used a .5 yd piece of leftover reflective fabric from the previous rain jacket project. It's not high vis reflective, but it definitely has a bit.
For the zippers, I wasn't quite sure what gauge I should get, and ended up with #6 for the kangaroo pockets, and #4 for the ticket and chest pockets. Since I wanted zipper pulls that rotated, I had to buy zipper by the yard. I really wanted plastic zips, but the fabric store had more selection in coil. I also got a prepackaged plastic zip for the jacket closure.
I wish I had thought more about it and purchased only bottom stops for all the pocket zips. They don't need to open at the top, and I'd actually feel a little more confident with them closed at both ends.
The pattern pictures have additional details not covered in the instructions. To the chest pocket, I added a little reflective ribbon tab with a D-ring to hang my compass on.
This is a slim-fitting jacket. I muslined it and went up two sizes to be able to wear a sweater underneath it (as recommended), and still needed to add 2" to the circumference of the biceps!
The first step in the instructions was to make the chest pocket. Through no fault of the pattern, I had to remake it SEVEN times. Then one of the kangaroo pocket zipper heads disintigrated. It was just one of those projects. I fixed them both, but it took me days.
The plastic closure zip was an inch too long, so I cut off some of the top teeth with wire cutters, and wow, those things really fly off to parts unknown! I'm sure I will be finding them in the years to come.
I realized I put the ticket pocket on the right arm, meant to put the ticket pocket on the left arm, and refused to fix it. No more 7-try pockets.
I modified the sleeve cuffs with a couple buttonholes to accommodate an elastic cord and toggle, so I could snug them up over gloves if needed.
Despite being very careful, I managed to reverse the left and right sleeves in the lining. At least it wasn't in the shell, and I can't tell when wearing it.
Seam sealing really slows down the process of sewing, too. I'm glad I had a lot of sewing knowledge. This was very challenging.
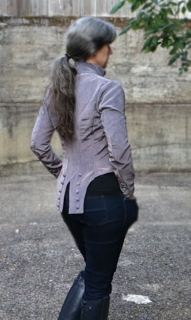
The jacket looks great (imho) in the above pictures and while wearing, but It's a little awkward to put on - I have to twist around to get the zipper lined up, For the same reason, I don't like to wear it with the zipper fully open. It hangs a bit oddly. For ventilation, so far, it's been fine just having it open to the waist.
I wish I had put more reflective material into this jacket while making it. But I refuse to put any more needle holes in the W/P/B that I have to seal! My next project is to get some peel 'n' stick fabric fuse, which despite the name, involves no fusing. It is a way to make stickers from fabric, and I have black and blue high-viz reflective fabric.
I could see making another one of these jackets, maybe out of wool, or something else warm.
...........................................................................................................................................
Started: 1/19/22
Finished: 2/7/22
Cost: ~$100


