Before I reconstruct the
dress I deconstructed (and make another dress - posts to follow), I am making a practice lapped zipper using Kathleen Fasanella's method, starting with
cutting out the pattern.
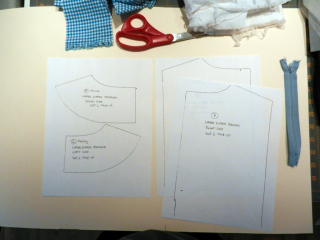
I assembled my constrasting fabrics, 7" zipper, scissors, and oak tag paper (left over from making a
tie for a facebook meme-thingy, which also included the
Geordie La Forge sleep mask, which
Wil Wheaton then made explode all over the internets (well, a tiny corner anyway)).
Uh. Where was I. Oh, right. And I need a stapler. OH! And a hammer! Yay! I found I like using oak tag as pattern paper - it's easier to keep everything in place. I started out fusing the facings, ie interfacing them, but quickly lost interest.
The neck seam allowance is 1/4" and everything else is 3/8". I noticed this on the deconstructed dress, as well. Where, when, and why did the 5/8" seam allowance come into play in commercial home sewing patterns?
I'm so used to following commercial sewing patterns where you're instructed to "sew in the middle of the zipper tape" that I didn't realize the seam allowances apply to sewing on the zipper in this case. I did noticed her stitching is really close to the zipper teeth, which I tried to replicate. But then I had a hard time moving the zipper pull.

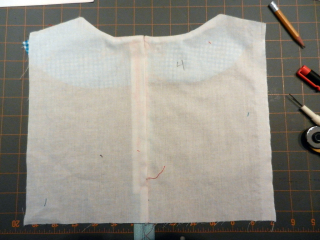
And the top doesn't close that well. I'm starting to feel like I suck at sewing again.

 First try. Yes.
 First.
Side note: This post is an edited version of notes I took during construction, and I actually did come up with this thought early on. "Ok. Thinking this through: the placement of the stitching line on the zipper tape doesn't really matter because it's the notch in the fabric at the neckline, indicating where to fold it, which results the lap." THE FOLD LINE IS THE IMPORTANT THING. I know this when sewing a regular lapped zipper, but for some reason, folding it right sides together folded my brain.
"Clipping at the bottom of the seam 1/4" does nothing unless you want the seams pressed to one side? You would have to clip 3/8" to get it to lay flat." I still don't get this.
Since the first try wasn't great, I tried again. I really don't like doing things twice. It's one of the reasons I hate writing: editing.

 Second try. I pulled a zipper out of my stash because I thought, "Surely, I will not need this anymore and I can reuse this".
The top was uneven, probably because I didn't cut the zipper to length. And the zipper slider pushed the lap open so you could see the zipper tape when it was supposed to be closed.*
So I tried again. I forgot to take a picture of the third try.
On this one I tried to make the lap wider so as to hide the zipper pull. I had the hardest time figuring it out. I thought I was reeeeally overthinking it, then I wasn't, then I was, etc, and ended up with about 50 bajillion "Oh, add 1/8" here and subtract it here" written on the patterns. It didn't work.
 Fourth try. You can see I'm getting tired of taking out threads.
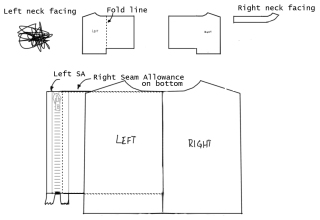
Fifth try! I finally figured it out! You need to
extend both edges of the center back zipper seam allowances
only. The more you extend, the further to the side it goes. So, theoretically, you could make a lapped zipper where the person in the seat next to you could unzip it for you. And so, correspondingly, the facings need to be adjusted. On the right, you would simply add the same amount you added to the seam. On the left, you would SUBTRACT. Think about it after looking at the picture.

Of course, in this example the left neck facing would be -8 inches long, thereby creating a rift in the space-time continuum and you would get dumped out in Ladd's Addition never to be seen again (inside joke with gorthx , haha).
 Fifth try with 1/8" wider lap and zipper pull well hidden. Jeezy Creezy!
*And boy, were these zippers cheap! I'm glad I used these for this project and not something in which I actually wanted to have functioning zippers. The zipper pulls on both ended up crooked in the slider, and while straightening one of them, I actually tore it off with my bare hands, and I have
laughable pinching strength. The zipper stop on one just... fell off.


